How to Send Email from React.js to Gmail Using Email API
Introduction
Introduce the concept: Briefly explain why developers might want to send emails from a React.js application, such as for contact forms, order confirmations, or notifications.
Highlight the tools: Mention the tools you will be using in the article (e.g., EmailJS, SMTP servers, APIs).
Overview of the steps: Provide a brief overview of the steps you will cover in the article.
Setting Up Your React Project
- Install React: Show how to set up a new React project if needed, or mention that readers should already have one.
npx create-react-app email-sender
- Install dependencies: If using EmailJS, install any necessary packages.
npm install emailjs-com
Creating the Email Sending Form
- Form layout: Add an example form in React.js with fields like Name, Email, Subject, and Message.
<form id="contact-form">
  <input type="text" name="name" placeholder="Your Name" />
  <input type="email" name="email" placeholder="Your Email" />
  <input type="text" name="subject" placeholder="Subject" />
  <textarea name="message" placeholder="Your Message" />
  <button type="submit">Send Message</button>
</form>
Setting Up EmailJS
Sign up for EmailJS: Walk the user through creating an account on EmailJS Website and setting up a service and a template.
Create a service: Show how to set up Gmail as the email service.
Create an email template: Explain how to define an email template that maps to the form inputs.
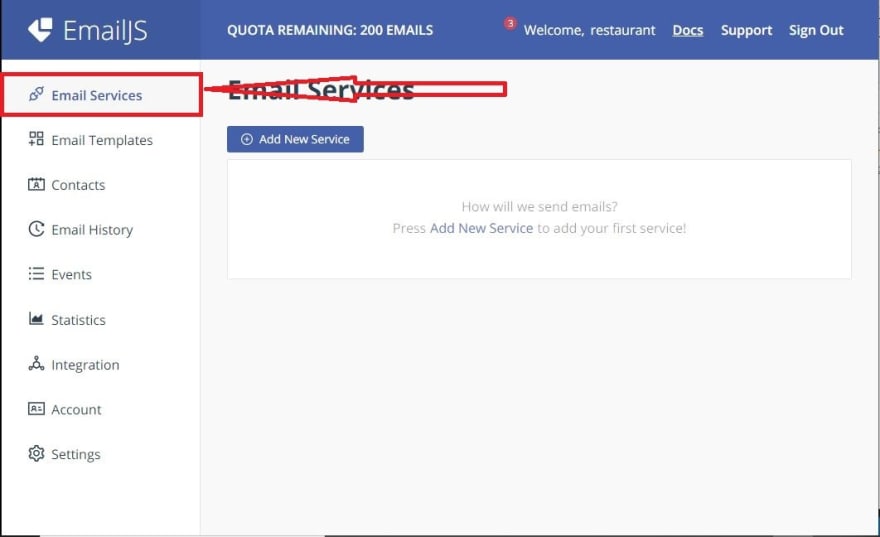
- On the side menu, click on Email Services:
- Click on Add Email Service:
- Select Gmail from the dialogue box:
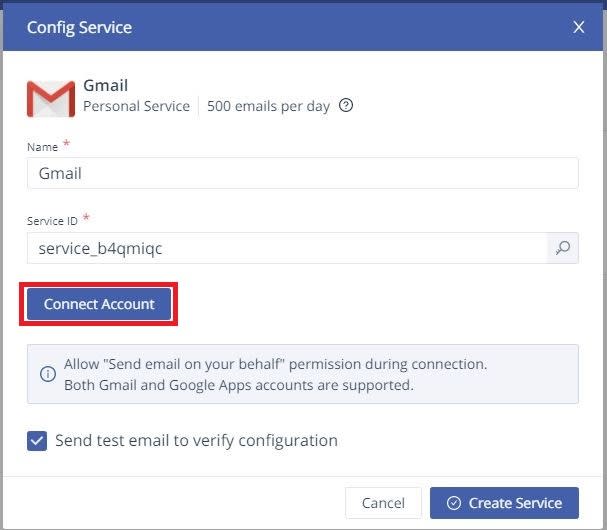
You can now see your Service ID in the screen that follows
Click on Connect Account just below the Service ID.
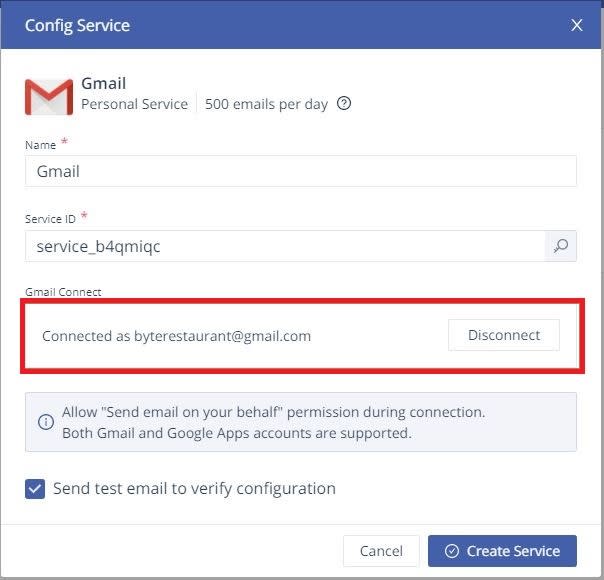
- After clicking on Connect Account.
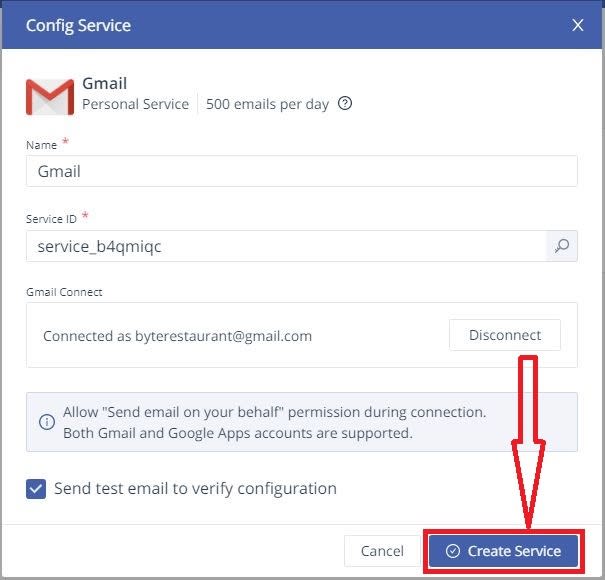
- Finally, click on Create Service to complete the Email Service creation
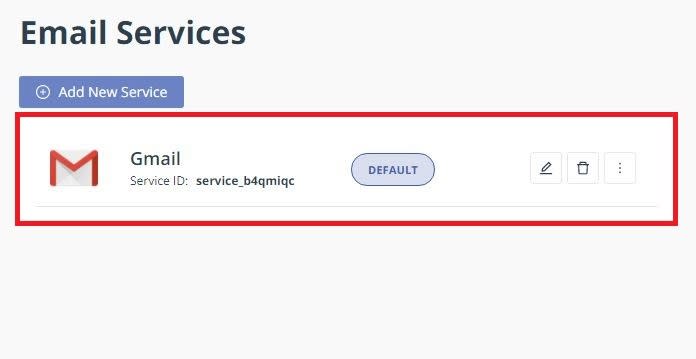
- You should now have a new service added like so:
Create Your Email Template
Click on Create New Template.
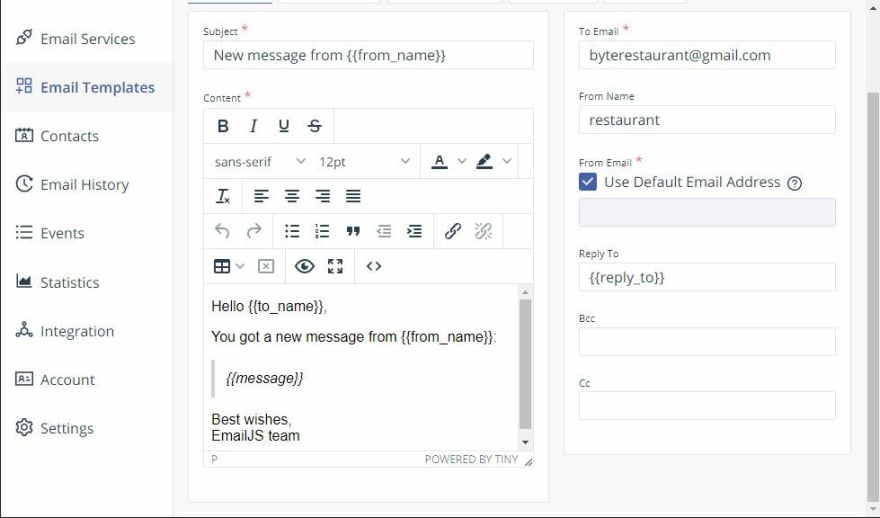
You will now have the template screen like so:
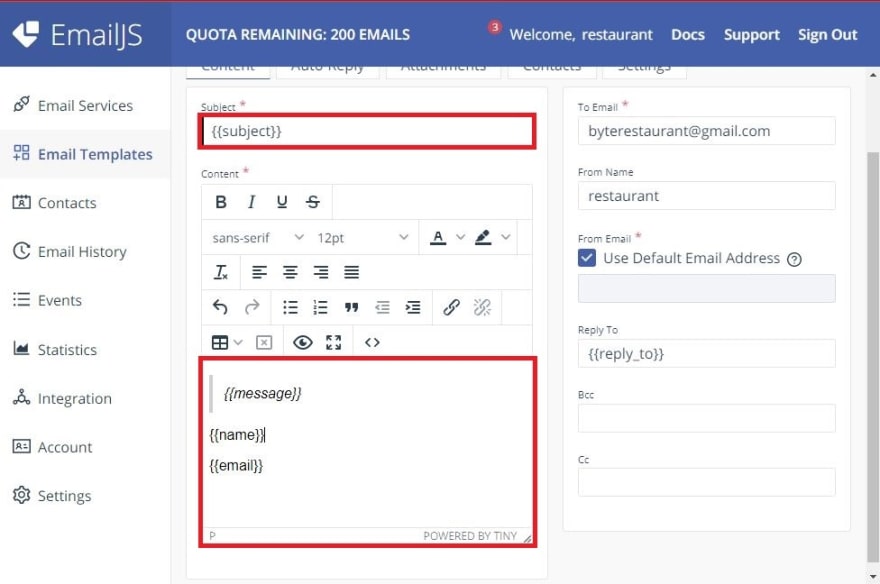
- The screen now looks like this:
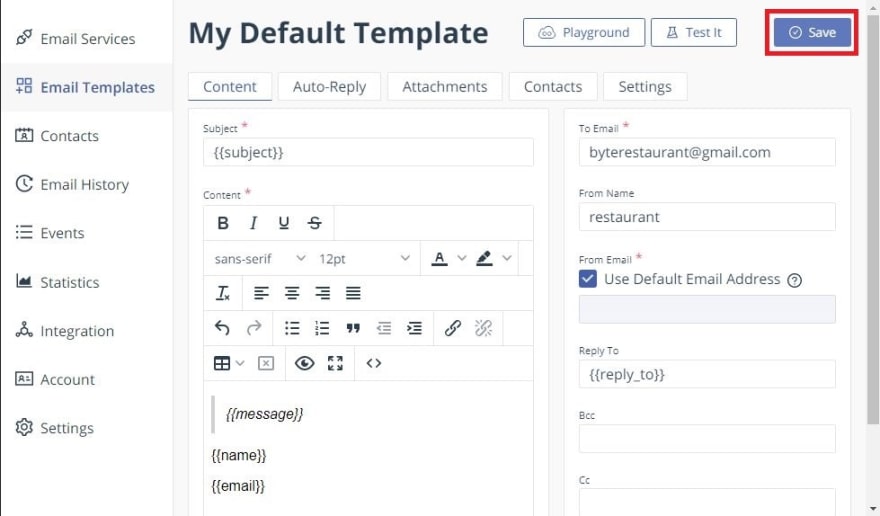
- Click on Save
Configuring Environment Variables
- Environment variables setup: Guide users to move the
service_id,template_id, anduser_idto an environment file for security.
REACT_APP_EMAILJS_SERVICE_ID = your_service_id
REACT_APP_EMAILJS_TEMPLATE_ID = your_template_id
REACT_APP_EMAILJS_USER_ID = your_user_id
- Accessing the variables: Explain how to reference the environment variables in the React app.
Sending the Email from React
- EmailJS integration: Show how to import EmailJS in the component and configure the
sendmethod to send the form data via EmailJS.
import emailjs from 'emailjs-com';

const sendEmail = (e) => {
  e.preventDefault();
  emailjs.sendForm(
    process.env.REACT_APP_EMAILJS_SERVICE_ID,
    process.env.REACT_APP_EMAILJS_TEMPLATE_ID,
    e.target,
    process.env.REACT_APP_EMAILJS_USER_ID
  ).then(result => {
    console.log(result.text);
  }).catch(error => {
    console.log(error.text);
  });
};
- Add form handling: Connect the form to the
sendEmailfunction.
<form onSubmit={sendEmail}>
  <!-- form inputs -->
  <button type="submit">Send Message</button>
</form>
Testing and Debugging
Test the form: Guide users on testing the form by sending a message.
Check Gmail inbox: Explain how to verify if the message arrives in the Gmail inbox.
Common issues: Provide troubleshooting tips for common issues like wrong API keys, incorrect service IDs, or blocked emails by Gmail.
Enhancements (Optional)
Adding validation: Briefly explain how to add form validation using libraries like Formik or using native HTML5 validation.
Success/Error messages: Add user feedback with a success or error message after form submission.
Conclusion
Recap the process: Summarize the steps and what has been achieved.
Next steps: Encourage users to explore additional features, like sending attachments or customizing email content further.

